Tips on How to Fix Water Damaged Swollen Wood Furniture
How to fix water damaged swollen wood furniture is a very common question that many homeowners have. Whether it’s due to a spill, a leak, or a flood, water damage can significantly affect the appearance and structure of your furniture. We will walk you through detailed steps on how to assess and solve this problem and explain how professionals handling water damage restoration Springfield MO can also help you do it.
How to Recognize Water Damage on Wood Furniture
When wood furniture gets wet, it can swell, discolor, and develop bubbles. These signs show that the wood has absorbed water, which can weaken its structure over time. Recognizing the signs of water damage early on can help you take the necessary steps to fix the problem before it becomes severe.
Assessing the Damage
Before you start any restoration work, it's important to assess the extent of the water damage. Minor damage may involve slight swelling or small bubbles, while severe damage might include large discolored areas and extensive warping. Understanding the severity will help you determine the best approach for restoration.
Here is How to Fix Water Damaged Swollen Wood Furniture
Here’s a step-by-step guide to fixing water-damaged swollen wood furniture:
Step 1: Drying the Furniture
First, make sure the furniture is completely dry to prevent further damage and mold growth. Use dry cloths or towels to absorb any surface moisture carefully. Pay special attention to gaps and joints where water may have seeped in. Allow the furniture to air dry in a well-ventilated area. If the weather allows, you can also place the furniture outside under a covered area to speed up the drying process.
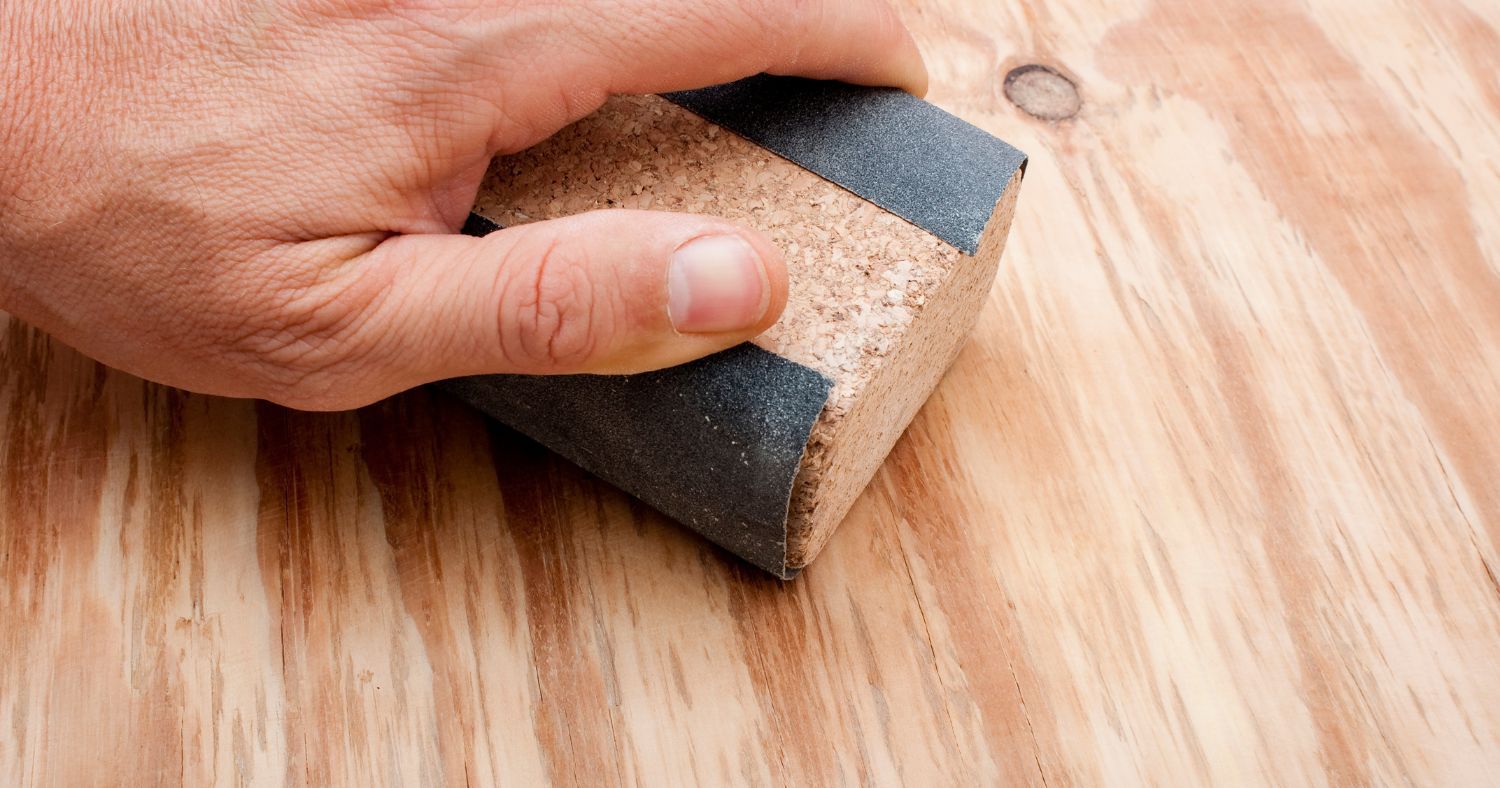
Step 2: Sanding Down Swollen Areas
Once the furniture is thoroughly dry, it’s time to tackle the swollen areas. Use a piece of medium to coarse-grit sandpaper (around 80-120 grit) to gently sand down the swollen spots. Work in the direction of the wood grain to avoid creating unnecessary scratches. This initial sanding helps to level the surface and prepare it for the next steps.
Step 3: Applying Wood Filler
Inspect the furniture for any cracks, gouges, or holes caused by the water damage. Prepare your wood filler according to the manufacturer’s instructions. Using a putty knife, apply the wood filler to the damaged areas. Smooth it out evenly to make sure it fills the gaps completely. Allow the wood filler to dry according to the manufacturer’s recommended drying time. Once dry, lightly sand the repaired areas with fine-grit sandpaper (around 180-220 grit) to blend it with the surrounding wood surface.
Step 4: Sanding Again
After the wood filler has dried and been smoothed down, start sanding the entire surface of the furniture again. Use fine-grit sandpaper (around 220-320 grit) this time to achieve a smooth and even finish across the entire piece of furniture. Sand lightly and evenly, making sure to remove any rough patches or imperfections left from the previous steps.
Step 5: Staining and Sealing the Wood
Once you’ve achieved a smooth surface through sanding, it’s time to restore the color and protect the wood. Choose a wood stain that closely matches the original color of the furniture. Apply the stain evenly using a brush or a soft cloth, following the manufacturer’s instructions for application and drying times. Allow the stain to get through the wood for the recommended duration before wiping off any excess stain with a clean cloth.
After the stain has dried completely, apply a wood sealant or polyurethane finish to protect the wood from future water damage and improve its durability. Use a brush to apply thin, even coats of sealant, allowing each coat to dry completely before applying the next one. This final step not only seals the wood but also gives it a perfect finish that enhances its natural beauty.
If you need to repair water damaged plywood, sealing it properly will prevent further deterioration and extend its lifespan.
How to Fix Water Damage on Wood Table
Wood tables are especially prone to water damage due to their flat surfaces. Here’s how to fix a wood table top with water damage:
- Dry the Table Thoroughly: Follow the drying steps mentioned earlier.
- Remove Water Stains: Use a mixture of baking soda and water to gently scrub away water stains.
- Sanding and Refinishing: Sand the damaged area and refinish it to restore its original look.
Read About - How to Repair Kitchen Cabinets with Water Damage?
Dealing with Wood Table Water Damage Bubbles
Water damage bubbles on wood surfaces occur when water gets trapped under the finish. Here’s how to fix this issue:
- Puncture the Bubbles: Use a sharp needle to carefully puncture the bubbles and release the trapped moisture.
- Sand the Area: Sand the area gently to smooth out the surface.
- Refinish: Apply a fresh coat of finish to seal the wood.
Preventive Measures
To prevent future water damage to your wood furniture, take into account the following tips:
- Use Coasters and Mats: Place coasters and mats under cups and hot dishes.
- Maintain Humidity Levels: Use a dehumidifier to control humidity in your home.
- Regular Maintenance: Regularly check and maintain your furniture to tackle any issues early on.
Read About 10 Water Damage Prevention Strategies
When to Seek Professional Help
If the damage is extensive or you’re unsure about the restoration process, it’s best to seek professional help. Professional water damage restoration services have the expertise and tools to handle severe damage. Look for reliable services in your area to make sure your furniture is restored properly.
Contact ABC Environmental Contracting Services in Springfield to Restore Your Water-Damaged Furniture
Don't let water damage ruin your beautiful wooden furniture. Contact ABC Environmental Contracting in Springfield today to help you restore it! You can give us a call at (417) 409-1719 or fill out an online form on our website.